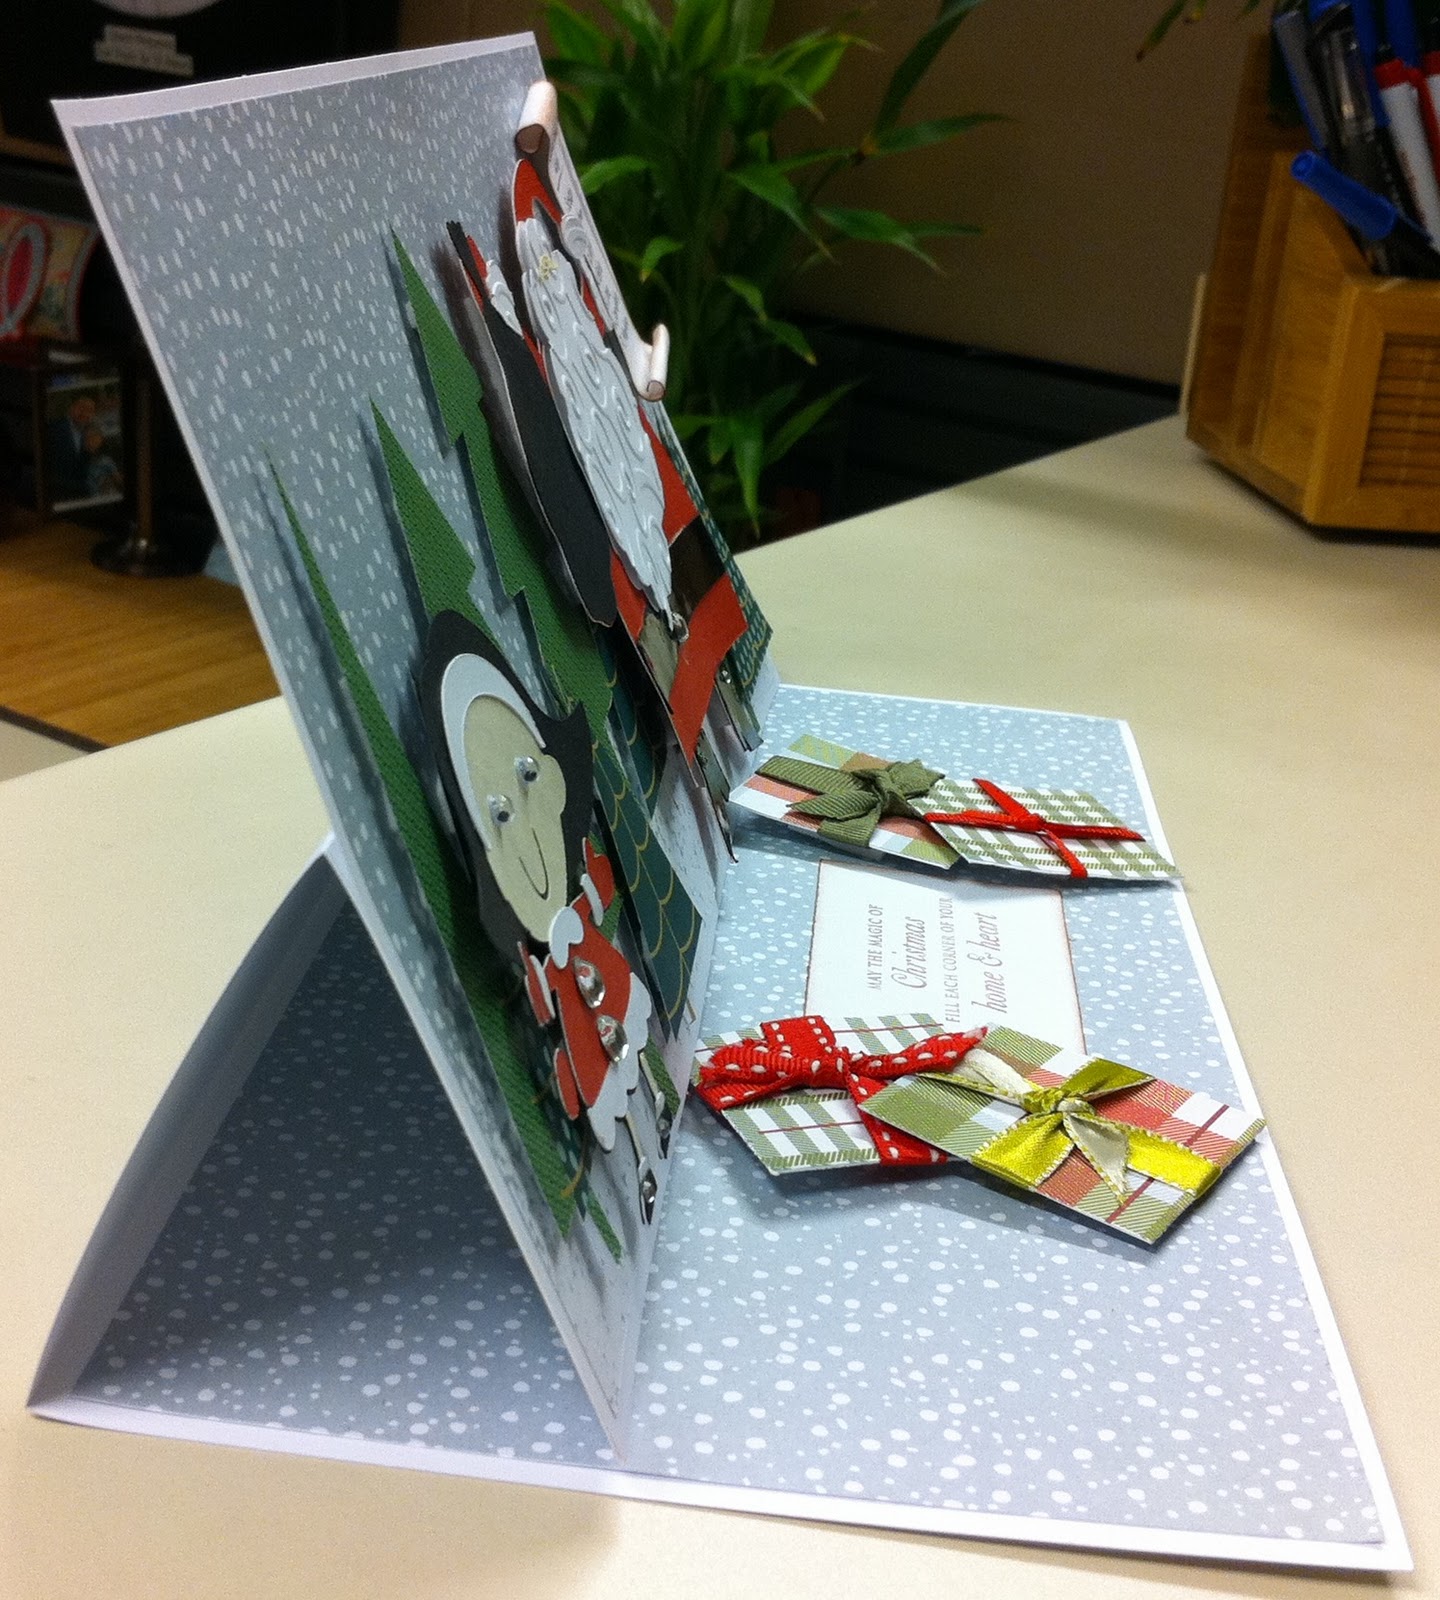
My co worker "REQUESTED" what she wanted her xmas card to look like lol she wanted Santa holding a list with her name on it. So because she was REQUESTING I had to go over the top with it. It measures 6x12!!! She loved it and it's still sitting on her desk lol!! I've included directions at the end as well. Hope you like it!
This card was made with the new Cricut Lite Jolly Holidays Cricut Cartridge and measures 12x6. Take a piece of white card stock (12x12) and score and fold in half at 6 in. Score the front side only at 3 in. Apply adhesive to only the lower section under the score line. Attach a piece of card stock 12x6 (It is key that you only adhere it to the lower half of the card). Adhere your base paper 11.75 x 5.75. Then adhere your trees using pop dots to add dimension.
Using the Jolly Holidays cartridge, cut out Santa at 5.50 inches and assemble. To add more dimension, cut Santa’s beard twice. Adhere the first cut flat, emboss and pop dot the second layer with the Swirls cuddlebug embossing folder. Cut the little girl at 2.50 inches and assemble. I’ve added extra bling with iRock gems to Santa’s boots and belt as well as the little girls dress. I’ve also added crystal effects to Santa’s belt and boots to make that patten leather look. Pop dot both images and add to the front of the card. I made the list using a small piece of card stock at 1x3 and took the end of my poking tool and wrapped the end of the paper around it to curl the ends of the list. Then add your names and ink your sides.
For the inside, cut and adhere your background paper (11.75 x 5.75). Fold back the front of your card and choose a place which you want your card to stop or stay open. This is where you will place your presents. I made mine with card stock cut at 2x2 and wrapped ribbon around them. Add your greeting and pop dot your presents. It is key to pop dot the presents since this is what will keep your card front open.